How to Document Construction Noise, Vibration, and Dust Damage Near Your Home
Learn practical ways to document construction noise, vibration, and dust near your home using smartphone videos, water-glass tests, photos, and damage logs.

Living next to a new construction site can expose residents to repeated construction noise, vibration, and dust.
The problem is that once the construction work is finished, it can become difficult to explain how severe the disturbance actually was.
That is why it is important to start collecting evidence while the construction activity is happening.
You do not always need professional equipment to document the situation. A smartphone and a few simple household items can help you create useful supporting evidence.
Quick Answer: How Can You Document Construction Damage Yourself?
You can collect basic evidence by:
- Recording construction noise with your smartphone
- Filming water ripples in a glass to show vibration
- Recording shaking windows, blinds, or doors
- Photographing cracks with a ruler for scale
- Comparing a clean windowsill with dust accumulation several hours later
- Wiping construction dust with a clean white wet wipe
- Photographing dust on parked vehicles
- Keeping a daily construction damage log
The most important rule is simple:
Use the same location, the same method, and repeat the recording over time.
1. Record Construction Noise With the Source Visible
Do not record only the sound.
Whenever possible, record the construction equipment and the noise at the same time.
For example, if excavation work starts at 7:30 a.m., film the excavator or breaker from inside your home while recording the sound.
A useful comparison is:
Before construction work → During construction work → After work stops
This helps show that the noise becomes noticeably stronger while the construction equipment is operating.
How to Make the Recording More Useful
Use the same room and the same window whenever possible.
At the beginning of the video, state the date and time.
For example:
“August 5, 8:10 a.m. Excavation work is currently taking place.”
Then continue filming for around 30 seconds to one minute.
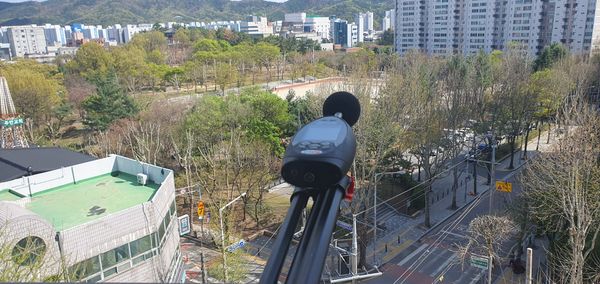
2. Use a Smartphone Sound Level App as Supporting Evidence
A smartphone sound meter app can help you record approximate noise levels.
Take a screenshot or video showing the reading while the construction equipment is operating.
Record:
- Date
- Time
- Measurement location
- Window open or closed
- Type of construction work
- Maximum displayed noise level
However, smartphone apps should generally be treated as supporting evidence rather than professional noise measurements.
Different phones use different microphones, and calibration accuracy varies.
If a serious compensation dispute is expected, professional noise monitoring may be necessary.
3. Film Water in a Glass to Make Vibration Visible
Construction vibration can be difficult to show in a normal video.
One simple method is to use a transparent glass of water.
Fill a clear glass about 70–80% with water and place it on a stable indoor windowsill or table.
When excavation, drilling, rock breaking, or piling work begins, record the surface of the water.
If the water repeatedly ripples during the construction activity, the video can help visually document the timing of the vibration.
For a stronger comparison, film:
Before the work starts → During vibration → After the work stops
If possible, position the camera so that both the water glass and the construction site can be seen.
Important Limitation
A water-glass test does not measure vibration intensity.
It cannot replace a professional vibration meter.
It should be used only as visual supporting evidence that vibration was experienced at a certain time.
Always place the glass safely indoors where it cannot fall.
4. Record Shaking Windows, Doors, and Blinds
Construction vibration may cause household objects to visibly shake.
Useful objects to record include:
- Window handles
- Sliding windows
- Blind cords
- Curtains
- Door handles
- Hanging lights or lightweight objects
Use a close-up video so that the movement is clearly visible.
During the recording, explain what is happening.
For example:
“The window begins shaking whenever the excavator starts breaking the ground.”
Also record the construction equipment separately so that the vibration can be connected to a specific construction activity.
5. Photograph Wall or Ceiling Cracks With a Scale
If you notice cracks after construction vibration begins, photograph them immediately.
Do not take only a close-up photo.
First take a wider photo showing the location of the crack.
Then place a ruler or measuring scale next to the crack and take another close-up photo.
Repeat the same photograph periodically.
For example:
Day 1 → One week later → Two weeks later → One month later
Using the same camera angle and measuring reference makes it easier to see whether the crack has changed.
Keep the original image files.
6. Clean the Windowsill First to Document Construction Dust
A photograph of a dirty windowsill does not necessarily prove when or where the dust came from.
A better method is to create a before-and-after comparison.
First, clean the windowsill thoroughly.
Take a clear photograph showing that it is clean.
Record the time.
For example:
8:00 a.m. — Windowsill cleaned
Then leave the area untouched while nearby construction continues.
Several hours later, photograph the exact same location again.
For example:
1:00 p.m. — Dust accumulation after five hours of construction work
This produces a much clearer timeline.
7. Use a White Wet Wipe to Show Dust Accumulation
Before cleaning the accumulated dust, record the entire windowsill.
Then take a new white wet wipe.
Show the clean wipe to the camera first.
Wipe one predetermined section of the windowsill once.
For example, always wipe the same 30 cm section.
After wiping, show the dust-covered tissue clearly to the camera.
A useful video sequence is:
Clean windowsill → Dust accumulated → Clean wet wipe → Wiping → Dust on the wipe
Repeating this process on different construction days can help show how frequently dust is accumulating.
This method does not identify the chemical composition or exact source of the dust, but it can provide useful visual documentation.
8. Use a Clean White or Dark Surface to Monitor Dust
Another simple method is to place a clean flat surface near the affected window.
A white board can make dark dust easier to see, while a dark surface can make light-colored dust more visible.
Place it in the same location for a fixed period.
For example:
8:00 a.m. — Clean surface placed
5:00 p.m. — Surface photographed after construction activity
Record the construction work that occurred during the same period.
This is still not a substitute for professional particulate monitoring, but it can help demonstrate dust deposition over time.
9. Photograph Construction Dust on Your Vehicle
Vehicles parked near construction sites can also collect significant amounts of dust.
Take photographs immediately after washing the vehicle.
Then park it in the same location while construction work takes place.
Later, photograph:
- Windshield
- Hood
- Roof
- Side mirrors
Before touching the dust, take a wide photo showing the overall condition.
You may then draw a line through the dust with your finger to make the accumulation easier to see.
Keep car wash receipts as well.
Repeated cleaning expenses may become relevant when documenting actual financial loss.
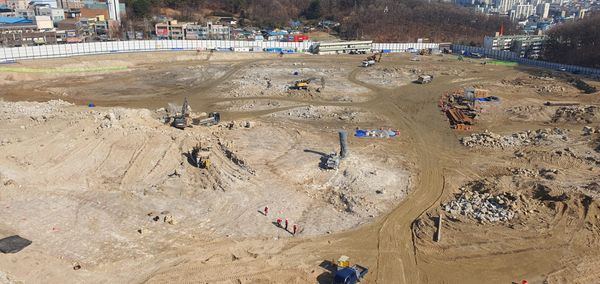
10. Show the Distance Between Your Home and the Construction Site
A close-up photo of dust or a vibrating window does not show where the construction site is located.
Create a separate video showing:
Inside your home → Window or balcony → Construction site → Active machinery
Move the camera slowly.
This helps document the physical relationship between the affected property and the construction activity.
You can also save a map or aerial image showing the approximate distance between your home and the construction site.
11. Record the Type of Construction Work
Not all construction activities generate the same level of noise, vibration, or dust.
Record what type of work was happening during each incident.
Examples include:
- Demolition
- Excavation
- Rock breaking
- Drilling
- Pile driving
- Soil loading
- Dump truck operation
- Concrete pouring
- Heavy equipment operation
A simple record might look like this:
August 5 / 9:20 a.m. / Rock breaker operating / Strong vibration / Video recorded
Over time, these records can help identify which construction activities caused the greatest disturbance.
12. Always Record From the Same Location
Consistency is more important than creating dramatic footage.
Do not record from a different window or room every time.
Choose one or two fixed recording locations.
For example:
Living room window, 9:00 a.m.
Record from that same location repeatedly.
Monday
Tuesday
Wednesday
Thursday
This makes comparison much easier and can help demonstrate that the problem is recurring.
13. Keep a Construction Damage Log
Hundreds of photos and videos become difficult to understand without a written timeline.
Create a simple construction disturbance diary.
Record:
Date | Time | Construction Activity | Noise | Vibration | Dust | Evidence File
Example:
August 5 / 8:20 a.m. / Excavation / Very loud / Window shaking / Moderate dust / 2 videos
You can also rename files systematically.
For example:
2026-08-05_0820_excavation_vibration.mp4
or
2026-08-05_1300_windowsill_dust.jpg
A consistent file naming system can save significant time later.
14. Keep the Original Photos and Videos
Do not keep only compressed copies sent through messaging apps or social media.
Store the original files recorded by your phone.
Avoid filters and unnecessary editing.
Create separate folders such as:
- Construction Noise
- Construction Vibration
- Construction Dust
- Building Cracks
- Complaints
- Cleaning Receipts
- Medical Records
Back up important evidence to cloud storage or an external drive.
What Is the Best Way to Collect Construction Damage Evidence?
The strongest self-collected evidence usually shows a clear sequence:
Construction activity → Noise, vibration, or dust → Effect inside the property → Repeated documentation
Instead of relying on one dramatic video, build a timeline.
The most useful pattern is:
Before → During → After
and
Same location → Same method → Repeated recordings
Can These DIY Methods Prove a Compensation Claim?
Not by themselves in every case.
A smartphone sound level reading, water-glass vibration video, dusty wet wipe, or windowsill comparison is generally supporting evidence.
These methods cannot replace:
- Calibrated professional noise measurements
- Professional vibration monitoring
- PM10 or PM2.5 testing
- Dust composition analysis
- Structural engineering inspections
However, well-organized personal records can help demonstrate when the problem occurred, how often it occurred, and how it affected daily life.
If the disturbance is severe or compensation is being considered, combine your personal evidence with official complaints and professional measurements.
Construction Damage Evidence Checklist
Noise
Record the construction equipment together with the sound.
Vibration
Film water ripples, shaking windows, blinds, or doors.
Building Cracks
Photograph the same crack with a ruler over time.
Dust
Compare a freshly cleaned windowsill with the same location several hours later.
Dust Wipe Test
Use a clean white wet wipe on the same measured section.
Vehicle Dust
Photograph the vehicle immediately after washing and again after construction activity.
Construction Activity
Record the exact machinery or construction phase.
Timeline
Write down the date, time, duration, and type of disturbance.
Original Files
Keep unedited original photos and videos.
Frequently Asked Questions
Can I use a glass of water to prove construction vibration?
A glass of water can visually show that vibration may be occurring, but it cannot measure vibration intensity. It should be treated as supporting evidence rather than a professional vibration test.
Can a smartphone app prove construction noise levels?
A smartphone app can provide useful reference data, but microphone accuracy varies between devices. Professional calibrated measurements are more appropriate for formal disputes.
How can I document construction dust?
Photograph a clean surface first, then photograph the same surface after several hours of construction activity. A clean white wet wipe can also help visually demonstrate dust accumulation.
Should I record the construction site itself?
Yes. Whenever possible, document both the damage and the construction activity occurring at the same time. This helps establish a clearer timeline.
How often should I collect evidence?
Whenever significant noise, vibration, or dust occurs. Repeated recordings from the same location are usually more useful than a single isolated recording.
Final Takeaway
If you live near a construction site, start documenting problems before the project is completed.
For construction noise, vibration, and dust, the most useful evidence is usually not one dramatic photograph.
It is a consistent record showing:
When the construction occurred, what work was being performed, what happened inside your home, and how often the problem repeated.
Start with simple tools, keep the original files, maintain a clear timeline, and obtain professional measurements if the dispute becomes serious.